First, if at all possible, use the WP Migrate DB Pro or BackupBuddy plugins to migrate your WordPress database. The money spent will save yourself a lot of frustration and hair pulling, and hours if not days of cleanup and massaging of the WordPress database.
But if that’s not possible, welcome to my world for the past week. I’ve had to migrate a WordPress database without my favorite migration tools. After scouring the web for tutorials and tips, I’m compiling them here for easy reference.
Gather Your Tools
First thing you need is to get your hands on the following:
1. Database name, prefix, user and password.
You can find these defined in the wp-config.php file. In the following examples, be sure to swap out the database name wordpress and prefix wp_ with the correct values from your situation.
2. Access to phpMyAdmin so that you can interact with the database.
We’ll be running the commands below through the SQL tab in phpMyAdmin.
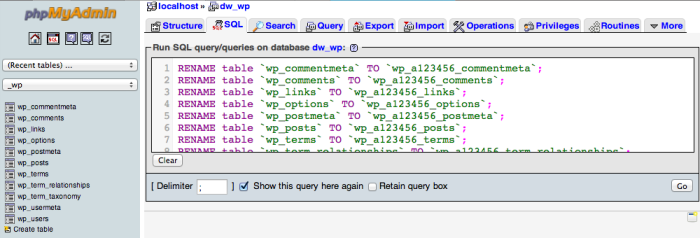
Running SQL queries on your database with phpMyAdmin
You could also connect directly to MySQL through the terminal / shell prompt. Good luck if you don’t have phpMyAdmin.
3. Backup, Backup, Backup
Don’t say I didn’t warn you. Export your untouched database and lock it up. If all goes wrong, restore to this backup.
Change the Site URL
The first thing you would want to do is to change the site URL. You can browse the wp_options table for the siteurl and home options values directly, or you can use this SQL command:
UPDATE wp_options SET option_value = replace(option_value, 'http://www.oldsiteurl.com', 'http://www.newsiteurl.com') WHERE option_name = 'siteurl' OR option_name = 'home';
Next, you’ll want to replace all instances of oldsiteurl.com in your post’s contents and GUID.
UPDATE wp_posts SET post_content = REPLACE (post_content, '//www.oldsiteurl.com', '//www.newsiteurl.com');
UPDATE wp_posts SET guid = REPLACE (guid, '//www.oldsiteurl.com', '//www.newsiteurl.com');